Wednesday, August 29, 2012

Don't Cry! It's Just Onions!

I recently went on a culinary tour of San Antonio.  Luke, Bin 555, Le Frite, and Carrabba's.  OK, so Carrabba's isn't exclusive to SA, but their calamari is always crispy and never chewy and the Ricardo sauce is to die for.  Buttery, lemony, peppery!  (Hmm... I just remembered I'm supposed to try and figure out that sauce.  Add it to the list!)

Bin 555 was by far my favorite.  The meal started with a complimentary amuse bouche of oyster lettuce, red wine vinaigrette and sea salt. The effect was supposed to be of eating a raw oyster.  It was pretty close.  Briny, salty and refreshing!  Prince Edward Island Mussels in a traditional white wine and garlic broth for an appetizer.  So tasty.  An entree of rabbit kiev with asian vegetables was next.  A delicately fried ball of rabbit stuffed with butter that exploded with flavor when you cut into it.  We finished with a Nutella torte for dessert which sounds heavy but was really light and not too rich.  We also ordered a lamb meatball pizza to take home for lunch the next day but we had to have a piece while it was fresh out of the oven.  This pizza had so much flavor.  It was decadent and elevated, but not pretentious.

I had high hopes for Le Frite but was under impressed.  We ordered the Pesto (basil, garlic, herb butter and white wine) and the Chai (red curry, coconut milk) mussels.  The Pesto was very heavy on the butter and the stems from the basil and various herbs were left whole and were woody and inedible. The Chai was slightly more flavorful/memorable, but again, very heavy on the butter.  Don't get me wrong, everything's better with butter, but when I order mussels, I want mussels, not a bowl of butter.  The mussels we had at Bin 555 were much better.  (Frankly, MY mussels are better.)  The fries were heavenly!  All criticism aside, however, the staff was lovely and accommodating.  We arrived almost a full half hour before they opened and were prepared to hang out in the the hot Texas sun but they let us come in and sit in the air conditioning and served us some drinks while they were setting up.  So nice.

Luke was also a delicious meal.  Oysters, braised short ribs, sea bass and a light and fluffy pot de creme.  The highlight however was the caramelized onion tart we had as an appetizer.  It sounded good to me, but my mom was really intrigued and insisted we order it.  I'm so glad she did!  I expected a filled pie shell or at the very least a folded over crust, but what came out was more like a thin crust pizza topped with caramelized onions, Emmentaler cheese and bacon!  The crust was SUPER crispy and the combination of the toppings was salty, rich and luxurious.

Below is my attempt to replicate this savory masterpiece.  The surprising thing about this dish is that the caramelized onions are the star, NOT the bacon!  (Although admittedly, I did my best to highlight the bacon as much as possible.)  Caramelized onions are an easy and yet time intensive endeavor.  You HAVE to cook them over low heat or they will scorch and just taste burned.  If done correctly however, the onions will be slightly sweet and buttery.  Do not attempt this recipe unless you have a full 1.5 hours to devote to it!

Because I was experimenting, I opted to use store bought pizza dough that I had in the fridge instead of making my own.  The pizza crust that was served at Luke was a traditional white, but I made mine on whole wheat because... well, that's what I had.  I also had to improvise with the cheese a little.  My store does not sell Emmentaler cheese (a mild Swiss) so I bought a combination of Gruyere and Jarlsberg.  I think the result was VERY close.  I hope you enjoy!

(Luke's) Onion Tart
1/2 pound bacon, chopped into bits
2 T butter
1 T Extra virgin olive oil (EVOO)
2-3 softball sized (or bigger) yellow or sweet onions, chopped into half moons and then in half again
Pizza crust, big enough to fit on a 12-in pizza stone
1 t caraway seeds
4 oz Emmentaler cheese (or 2 oz each Gruyere and Jarlsberg), grated
Salt to taste


In a large skillet, over medium high heat, cook bacon pieces until crisp.  With a slotted spoon, remove bacon to a plate covered with a paper towel.  Drain (but not completely) bacon fat to an appropriate receptacle.  Leave approximately 2T of bacon fat in the pan.


In the same pan, over medium high heat, add the butter and EVOO.  Let the butter melt and when it starts to bubble add all of the onions (you should get a great sizzle sound).


Do not be alarmed at the volume of onions.  They will reduce about 75%, so don't worry that you're cooking too much.

Toss the onions to completely coat with bacon fat/butter/EVOO mixture.  (Mmm...)  Sprinkle the onions with a hearty pinch of salt and continue to toss onions for approximately 5 minutes or until onions are just starting to turn translucent.  At this point, turn the heat down to medium low.  This is where the waiting begins.  The good thing about caramelizing onions is that you can now prep the other parts of this recipe while they're cooking.  And when you're done with that, you can read a book or have a kitchen dance party... or something.  Just make sure you stir the onions every couple of minutes.

Using a pastry brush, use some of the drained bacon fat (from your appropriate receptacle) to grease a pizza stone (or cookie/cake sheet if you don't have one).  Roll out your pizza dough very thinly and place on your stone.  Brush another thin layer of bacon fat on top of the pizza.  Prick the dough with a fork a few times just so your dough doesn't get puffy.  Cook the pizza crust according to package directions.  I think mine was 10-12 minutes at 375 or 400 (I can't remember).  In any case, you want the crust slightly browned and crispy.  Remove to a cooling rack so your crust doesn't steam underneath and become soggy.


You didn't forget to stir your onions did you?  :o)

Place your caraway seeds in a small dry skillet and toast over medium high heat just until the seeds start to put off their aroma.  (If you're nervous about toasting seeds - I've burned my fair share - you can skip this part.)  If you have a mortar and pestle or spice grinder, place your caraway seeds inside and grind to dust.  If you don't, give them a chop with a very sharp knife making them as dust-like as you can.  Warning, they WILL go everywhere, so just be mentally prepared for that.


When your onions are done they should look like this.


It will take 45 minutes to an hour for them to look like this!  (Truthfully, I erased the final picture when I pulled the onions off the heat.  These are almost done.  But see how much they've reduced!!!)

Set your oven to Broil.

To assemble your tart, place your crust back on your pizza stone and sprinkle half of the cheese over the crust.  Then sprinkle all of the bacon bits over the cheese.  Next, spread out your onions as evenly as you can.  (Caramelized onions do get a bit stringy, which is why I suggested cutting the half moons in half so that you don't get long strings of onions trying to follow you off the tart after you've bitten into it.  This also makes it a tad difficult to evenly distribute the onions.)  Sprinkle the caraway dust over the onions and then top with remaining cheese.   Place the tart on the middle rack under the broiler for a couple of minutes, just until the cheese is melted.  DO NOT WALK AWAY FROM THIS!  Broilers are HOT and burning is eminent if you don't pay attention.  In fact, my mom actually leaves the oven door cracked when she's broiling something and watches it intently until it's ready.  If you have that option, do that.  :o)


Cut the tart into pizza-like slices or squares and enjoy!


*My sister and I ate this tart with a side wedge salad.  If I stop to think about it, wedge salads are fairly preposterous to me.  A) It's not good for you.  Bacon, bleu cheese dressing and crumbles and the nutritional void that is iceberg lettuce.  B) When purchased at a restaurant, the markup is ridiculous.  A head of iceberg costs less than $2, which in turn makes 4 salads, and yet I've seen restaurants charge as much as $14 for the damn thing.  Are you kidding me?!?!  Buuuuut... the reality is, they are SO delicious!  The crisp and cold iceberg and tomato are so refreshing and the salty bacon and bleu cheese give it intense flavor.  It really is sheer perfection... when you make it at home and don't have to pay $14!!!

Thursday, July 5, 2012

Bumdoodler! Cheeky Monkey!!

This week, I'd like to take a respite from my kitchen to bring you a review of The Best Little Sandwich Shop in Texas: Bumdoodler's.  No, I didn't stutter.  That's the name.  Isn't it cute?


Bumdoodler's (or Bum's as the locals call it) is part REALLY good food and part nostalgia.  It's been around for 30+ years and little has changed.  Bums was purchased by Gerri Fiedler in 1982 (a good 10 years before I moved to Boerne) and Gerri's Pies was born at the same time.  Gerri makes the best damn pie I have ever eaten.  The cheesecake especially.  It's... sinful.  It is the richest, gooiest, smoothest cheesecake to ever pass these lips.  Gerri's daughter, Jana took over Bum's in 2000.  She still uses all of Gerri's original recipes and all baked goods and soups continue to be made on-site every day.  About a year ago, they also added cupcakes to the menu.

On any given day, during regular lunch hours (11:30-1) it's possible that you will find a VERY long line at Bum's.  Don't let it scare you.  They have been doing this for a long time and they know what they're doing.  They'll get you fed in a very reasonable amount of time.  If you get a cup of soup (and I recommend you do), you will receive that immediately and that will keep you, and your taste buds, gleefully occupied until your sandwich arrives.  If waiting isn't your thing, you can also call your order in.  Their menu is posted online (www.bumdoodlers.com) if you need it, but any devout  Boerne local, knows their order by heart (half #8, hot, with a cup of broccoli cheese soup).  And sometimes, we know our friend's orders too (half #8, hot, no onions).  :o)

Everything I've ever eaten at Bum's has been spectacular.
There is a rotating schedule of daily soup selections, with the broccoli cheese being featured daily.  I've only ever had the potato, once or twice, and the broccoli cheese, more times than I could ever count.  I have no idea what goes into this soup (it could be broccoli, Velveeta and milk for all I care) but it's... it's... perfect.  It's thick and creamy and hearty and perfectly seasoned.  I've never had its equal.


- The Gardener's Special is not just any vegetarian sandwich.  The pairing of the honey wheat bread with the avocado and cream cheese is genius.  And their Reuben, my second favorite sandwich on the planet, is also enhanced by the fresh baked rye bread they serve it on.

- I have to confess, for as much as I usually tout trying new things, I have rarely deviated from their signature sandwich, The Brainstorm (see #8 above).  Salami, ham, turkey, cheddar, Swiss, lettuce, onions, tomatoes,  and a "healthy" serving of mustard and mayonnaise on a roll the size of your head.  (Fortunately, you can order a half!)  The roll is slightly chewy on the outside and perfectly pillowy on the inside.  The combination of meats, cheeses and veggies is inspired.  But let's be real.  If you break it down, this is not a complicated sandwich.  It just has a lot of stuff on it, right?  Oh, you can try and make it.  Lord knows I have.  I purchased the exact rolls from Bum's and collected all of the ingredients.  I even nuked it to make it hot and melty just like I like it.  Even with all of the same components, it just wasn't right.  There was something missing.  I've often wondered if maybe they lace their condiments with crack, it's that good and addictive.  Honestly, whatever it is, I'm buyin'!

Things get a little melty when you order it hot!


The next time you're near Boerne, TX (or Kerville or North Austin!)) stop in to Bumdoodler's.  I promise whatever you have will be amazing, but if you get The Brainstorm, I promise it will blow your mind!  :o)

Saturday, June 23, 2012

Calling All Sheep!

Lately, I have been craving comfort food.  Never mind that temperatures are astronomical here in Texas.  I want down home, hot, filling.  It's the weirdest thing.

Despite my love of meat and potatoes, I never had Shepherd's Pie until I went to Ireland in 2009.  (I mean, if you're gonna do it, go all out, right?)  Oh, it was such a revelation.  Meat and vegetables in a thick gravy smothered in mashed potatoes.  Um, yes.  YES, PLEASE!!  I don't know if traditional versions of this dish were actually cooked in pie shells (Can you imagine adding a flaky crust to this?!?  Drool!!!) but the “pie” I had in Ireland was more like a casserole.  That particular serving came in its own single serving ceramic baking dish.  The mashed potatoes were crispy on the top but creamy underneath and the meat filling was meaty and juicy and FANTASTIC!

I made a trial run of this for my boyfriend a few weeks ago, and we both liked it so much, I decided it deserved a repeat performance and blog post.  My parents were the happy recipients of this go-round.  Everyone had two servings.  This is really easy and so hearty and delicious.

Shepherd's Pie
For the potato topping:
1.5-2 pounds russet potatoes
1/4 cup half-and-half
4 T butter
1/2 cup Parmesan cheese (I had a three-cheese blend on hand)
1 egg yolk
Salt and pepper to taste


For the meat and veg:
2 T extra virgin olive or coconut oil
1 cup diced onion
3 carrots, peeled and diced small
2 cloves garlic, minced or 2 t minced jarred garlic
1.5-2 pounds red meat of choice (I used 1lb lamb and 1/2lb venison)
2 T all-purpose flour
2 t tomato paste
1 cup chicken broth
1 t Worcestershire sauce
2 t fresh rosemary leaves, chopped
1 t fresh thyme leaves, chopped
1 cup frozen corn
1 cup frozen peas
Salt and pepper to taste


Peel the potatoes and cut into 1-inch dice.  Place in a pot and cover with cold water, lightly salted.  Cover and bring to a boil over high heat.  (Start meat and veg prep now!)  Once boiling, uncover, decrease the heat to medium and cook until you can pierce the potatoes with a fork, approximately 10 to 15 minutes.  Drain the potatoes in a colander and then return to the pot.  Place the half-and-half and butter in a microwave-safe container and heat in the microwave until butter is mostly melted, about 35 seconds.  Mash the potatoes with a potato masher until you've reached desired creaminess and then add the half and half and butter and stir to combine.


Taste for seasoning, and then add salt and pepper, Parmesan cheese and egg yolk stirring to combine.


Preheat the oven to 400 degrees.

While the potatoes are cooking, prepare the meat and veg.  In a large sauté pan, heat your oil of choice over medium high heat.


When the oil is hot (drop a piece of veg in it... it should sizzle), add the onion and carrots and sauté just until they begin to wilt and take on color, approximately 3-5 minutes.  Add the garlic and stir to combine.


Add the meat, salt and pepper to taste and cook until mostly browned and cooked through, approximately 3-5 minutes.  (The meat will have further opportunity to cook so if there's still some pink left, it's OK.)


Sprinkle the meat with the flour and stir to coat, continuing to cook for another minute or so.  Make sure all of the flour is absorbed.


Add the tomato paste, chicken broth, Worcestershire, rosemary, thyme, and stir to combine.


Bring to a boil, reduce the heat to low, and simmer 10 to 12 minutes or until the sauce is slightly thickened.  Remove meat and veg mix from the heat and add the corn and peas.  Stir to combine.


Spread meat and veg evenly into an 11x7-inch glass (or stoneware) baking dish (or slightly bigger if you have it).


Dollop mashed potatoes on top.


Using the back of a spoon, start smooshing the potatoes around the edges of the baking dish to create a seal to prevent the meat/veg from bubbling over and then smooth out the remainder.


Just for cleanliness' sake, place the baking dish on a baking sheet (foil or parchment lined if you like) and bake on the middle rack of the oven for 30 minutes or just until the potatoes begin to brown.  Let your casserole cool for 5-10 minutes before serving.


When you do dig in to this dish, might I ask for a moment of silence?  Breaking through the potato crust makes such a fantastic sound.  It deserves to be observed.  :o)


Saturday, June 16, 2012

Cevich-eh?

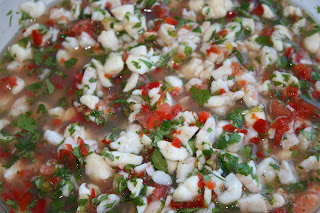
Per a Facebook request, this week's blog is both light and summery and, well... ceviche.  Ceviche (suh-vee-chey) is a Spanish dish of raw seafood marinated in lime/lemon juice.  Hold up... RAW?!?    Don't fret.  The acid in the citrus lends to a process called denaturing.  In essence, the acid "cooks" the seafood so that it's no longer raw.

My Aunt Debie first introduced me to ceviche.  To this day, her recipe is still my favorite.  I've had many variations but hers is very straight forward, simple and delicious.  It's a great base recipe that's completely modifiable.  The original recipe calls for shrimp only but for this post, I made a combination of shrimp and bay scallops.  We've also made this with halibut and I've had it with octopus as well.  You can also add different vegetables or fruit.  Ceviche with mango is FANTASTIC!

What's also great is there are so many serving options.  You can eat this with Tostitos or Fritos Scoops, crackers or pita chips, or you can toss it with some lettuce and eat it as a salad or just grab a fork and eat it straight.

Debie's Ceviche
5 or 6 lemons
6 or 7 limes
2 pounds raw seafood (1lb shrimp, 1lb bay scallops, for example)
1 red or orange bell pepper, diced, seeds and ribs removed
1 or 2 jalapenos, diced, seeds and ribs removed (to desired heat level)
1 medium tomato, diced
1/2 yellow onion, diced
1 clove garlic, minced or 1t of minced jarred garlic
1 whole bunch cilantro, diced
Salt and pepper to taste

Juice lemons and limes and put juice in a medium sized bowl.  I prefer to add 1-2 more limes than lemons b/c I like having a decidedly lime flavor.  This much fruit will yield approximately 1.5-2 cups of juice depending on how big/juicy your limes/lemons are.


To help your fruit release its juice, roll them on your cutting board giving them a little bit of pressure with your palm.  Rachel Ray also recommends putting your citrus in the microwave for 10 seconds to help soften them.


This is a fantastic juicing tool.


This is a better juicing tool.


Having both in your kitchen is preferred.  The manual tool for juicing just a few pieces of citrus.  The electronic one for making recipes like this.  I first purchased mine a few years ago when I was asked to make 20 pounds of a citrus based shrimp dish for my friend Cathie's wedding.  I got mine at Bed Bath & Beyond for about $30.  Tip: place a slightly damp towel under the juicer to keep it from slipping.  (Also works great under cutting boards!)

Peel, devein and rinse shrimp.  Rinse bay scallops.  Dice the seafood and add to the bowl of juice.  You want to make sure there's enough juice to cover all the seafood.  If not, add a little more juice.  (My mom and aunt like to cut bigger bites of seafood, but the smaller the dice, A) the easier it is to eat with a Tostitos Scoop, B) the better mix of ingredients you get in each scoop, and C) the more surface area you expose to the acid the faster the denaturing process.)


Place your bowl in the fridge for several hours until the seafood is no longer raw.  If using shrimp, the tell tale pink color is a good visual.  I can't tell you an exact time.  I put my mixture into the fridge at 9:30am, and then didn't mess with it until 5:30 that evening but I have no idea when it was actually ready.  If you stir the mixture every so often, that also speeds up the denaturing process.


Add the remaining ingredients to the bowl and stir to incorporate.


Put the bowl back into the fridge until chilled (another 30 minutes or so).  Choose your serving method of choice and enjoy.


Wednesday, June 6, 2012

Faux Pho

(Initially, I thought I would title this post No Pho For You but as I was discussing it with my mom she said, "I think you should title your post Faux Pho."  And then she giggled.  How could I say no to that?  :o))

One day while I was grocery shopping, I was perusing the Asian Food section and some thick, hearty Udon noodles jumped out at me.  I wasn't quite sure what I would use them for, but they were dried, so I figured they'd keep until I could figure it out.  It wasn't that long before I had a massive craving for Pho.  With the nearest Pho place being 20-30 minutes away I just had to make my own.  The only problem being that I have NO idea what's in Pho.  I mean, meat and vegetables with a broth base, but that's about it.  Time to roll up my sleeves and figure things out.

I scoured the fridge for my fresh ingredients.  Chicken, mushrooms, onions.  Check.  Boo!  No bok choy.  Wait, wait, wait... there in the back of the drawer.  What is that?  Celery!  That'll do.  Now to the pantry.  Chicken stock, beef stock.  Lime and Chili stock?  Oh yeah, I got that for free when I purchased... um... something else.  (Thanks HEB and your Combo Loco deals!)

The process to make this soup was very structured and defined.  Psh!  Yeah right!  This was a total fly by the seat of my pants kind of operation.  Fortunately, it worked.  It wasn't exactly like Pho, but it was pretty close.  It fulfilled my craving at the very least.  Plus, it was easy, I only dirtied one pot and I didn't have to drive 30 minutes to get it!

Faux Pho
Extra virgin olive oil (EVOO) or coconut oil
1 cup celery (2-3 ribs), de-ribbed and chopped into 1 inch pieces
1 cup sliced button mushrooms
1 cup chopped onion (white or yellow)
2 chicken breasts, chopped into bite-sized pieces
32oz chicken broth/stock
32oz lime and chili chicken broth/stock*
26oz beef broth/stock
1 garlic clove, minced or 1t minced jarred garlic
1T Nuoc mam**
1T soy sauce
1 8oz package dried Udon noodles
Salt and pepper

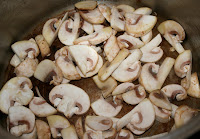
In a large soup pot, heat just under 1T of your oil of choice over medium high heat.  When it's hot, add your celery, and salt and pepper to taste.  Cook the celery until it just begins to get soft.  Remove to a plate and set aside.  Repeat this procedure with the mushrooms and onions, cooking each separately until just soft.


Add another tablespoon of oil to the pot and add your chicken.  Salt and pepper to taste and cook until just brown.  The chicken will continue to cook later on, so you want it to be raw in the center.  Remove chicken to your vegetable plate and set aside.


Turn the heat to high and pour the liquids into your pot, along with the garlic.  Use a wooden spoon to scrape all of the browned veg and chicken bits off the bottom of the pot.


Bring the broths to a boil and then add the Udon noodles.  Reduce heat to medium high and cook noodles according to the time on the package directions (10-12 minutes if memory serves).  During the last 5 minutes of cooking, add all the vegetables and the chicken to the pot.  (There is a chance that your broth will get "scuzzy."  It will look like dirty foam.  This is caused by the chicken you sauteed earlier.  It tastes fine, it just looks gross.  It will absorb back into the soup so just ignore it.)


Ladle into individual bowls and serve with Sriracha sauce so everyone can add their own heat.  Enjoy!!


*Lime and chili chicken stock is fairly regional, I feel.  If you can't find this in your store you can use regular chicken stock but add some lime juice and red pepper flake.

**A.k.a. Vietnamese Fish Sauce.  It's sooooo good y'all.  If you can't find this at your grocery store on the Asian/International food isle, the next time you pass a Vietnamese restaurant, run in and ask if you can buy some from them.  It keeps forever, and it adds such an authentic flavor to Asian dishes.  You can eliminate it if you can't find it at all, but oh, I hope you can!